
At Western Fireplace Supply, safety is our top priority when lighting your pilot light. We recommend ensuring the area is well-ventilated and free of any flammable materials. Before you begin, turn off the gas supply and wait a few moments to allow any lingering gas to clear. Using a long lighter or match, carefully ignite the pilot light while keeping your hands and face at a safe distance. Always refer to the specific instructions for your appliance, and remember, if you ever smell gas or feel uncertain, it’s best to stop and reach out to a professional.
We’re here to help, and your safety matters to us!
Step-by-Step Video of How to Light Your Fireplace Pilot
(Video is 3MB, so please be patient as it loads)
Easy Step-by-Step Instructions
STEP 1:
Remove the decorative fireplace front. Locate the gas supply valve (typically behind louvers, below the glass opening—it may be red or blue).
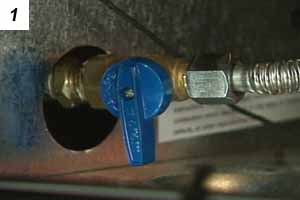
STEP 2:
Open the valve by pivoting the handle to parallel the gas line.
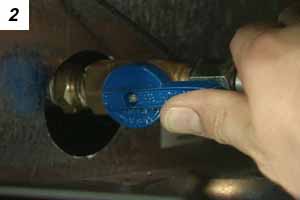
STEP 3:
Locate the pilot assembly with spark ignitor (located behind and below logs in the firebox – typically in the bottom center).
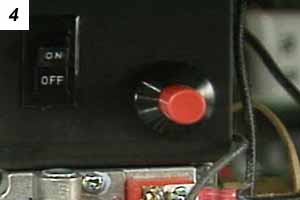
STEP 4:
Ensure the wall switch, remote control, and/or rocker switch shown in this picture are in the off position. Then, locate the red or black ignitor button.* Push the ignitor to verify the spark at the pilot area.
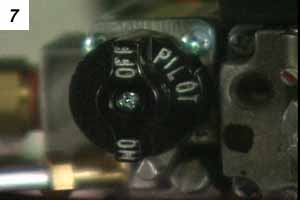
STEP 5:
Locate the black or green valve control knob (knob with the words “ON,” “OFF” and “PILOT” on it). Push in and rotate counter-clockwise until the word “pilot” is in the 6 o’clock position.**

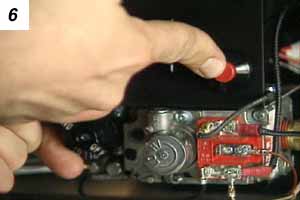
STEP 6:
While pressing and holding the valve knob (in the “PILOT” position – it should press in about 1/4″), press the red piezo button repeatedly (once per second) until the pilot ignites. If the pilot does not light, wait 5 minutes and try again. Once the pilot is lit, continue to hold the valve knob in for 60 seconds, then slowly release.
STEP 7:
If the pilot light goes out, repeat steps 5 & 6. Remember to shut the gas supply valve off (picture #1). If it remains lit, press the valve knob in slightly and rotate counter-clockwise until the word “ON” is in the 6 o’clock position.
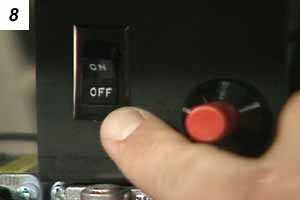
STEP 8:
Finally, turn the unit’s ON/OFF switch (or wall switch or remote control) to the “ON” position to start your fire.
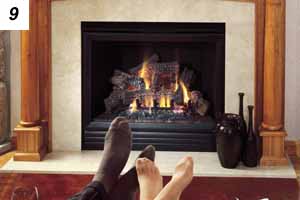
STEP 9:
Put the decorative front back on the fireplace before burning your fireplace. Ensure the glass is securely clamped on at all points before replacing the front.
*If you do not see a red or black spark ignitor button, you do not have a manual ignition system. If power is actively supplied to your fireplace, simply turn the on/off button, wall switch, or remote control to “on” to ignite your main burner.
** Note: Some valve assemblies may be inverted in their brackets. If yours appears to be the mirror image of picture #4, then the word “PILOT” will be at 12 o’clock to light the pilot, and “ON” will be set to the 12 o’clock position to turn on your main burner.
Intermittent Pilot Ignition Systems (Non-Standing Pilot Systems):
Turn the wall switch on. You should be able to see a spark at the pilot hood. If the pilot does not light within 45 seconds, turn the on/off switch back to the off position and wait 15 seconds. Repeat this step as necessary until the pilot ignites.
NOTE: If the on switch is left on for more than 60 seconds and the pilot does not light the fireplace, it will go into “lock out” mode.
Resetting your Itellifire Plus Ignition System
The following are the steps to take your fireplace out of “lock out” mode:
If your fireplace has a black reset button, push the button.
If your fireplace does not have a reset button, unplug the white Molex connector from the module located at the bottom of the fireplace to the right of the valve, wait 60 seconds, and plug it back in. As an alternative to unplugging the white Molex connector, you may turn off the power to the fireplace at the breaker box, wait 60 seconds, and turn the power back on.